

Congratulations on your new suplest cycling shoes! Proper cleat installation ensures efficient power transfer, comfort, and safety while riding. This guide will walk you through installing 2-bolt cleats on your GRAVEL/MTB shoes step-by-step.
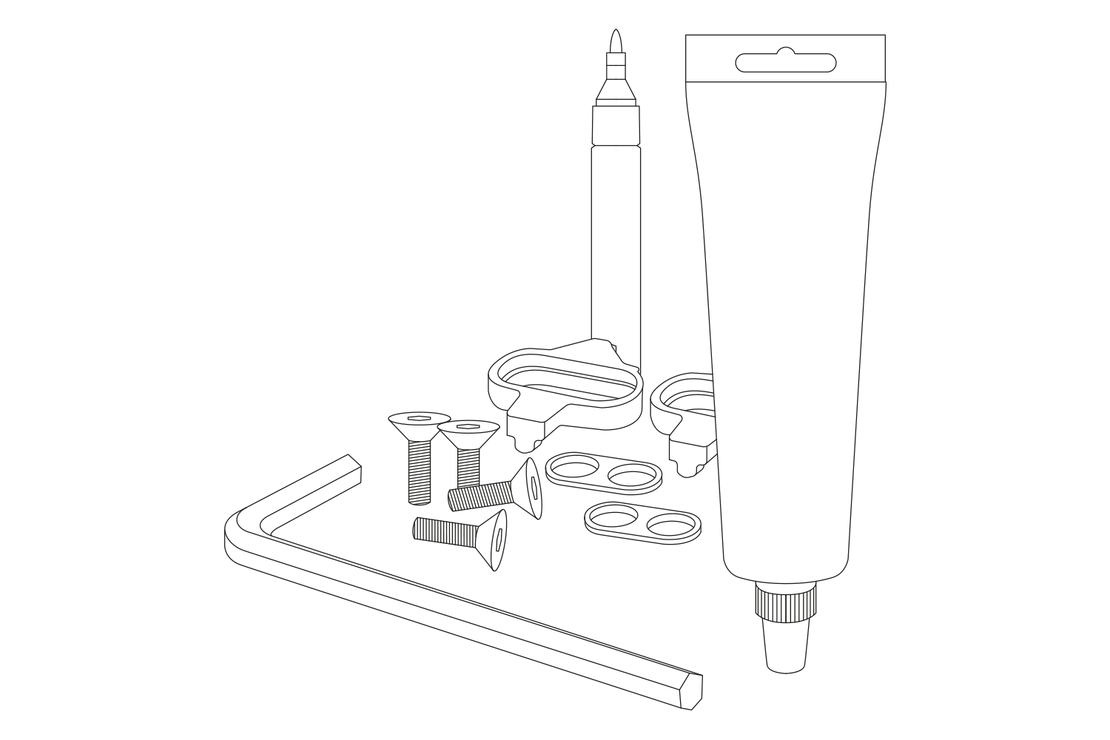
Tools & Items You'll Need
- 2-bolt MTB cleats (included with pedals or purchased separately)
- Cleat screws (usually included with cleats)
- Grease (not included)
- Cleat washers or spaes (if provided with pedals or purchased separately)
- Allen wrench (4mm or 5mm – depending on the pedal brand)
- Marker or tape (optional, for positioning)
Step-by-Step Installation
Please be aware:
Improper pedal installation can lead to uneven pressure during engagement, which may damage the shoe sole, causing wear to the rubber or even separation of the rubber sole from the shoe. Not following these instructions for checking the cleat clearance will void any warranties covering sole damage or separation in the cleat pocket area.
Step 1: Locate the Cleat Mounting Area
- Look at the outsole of your cycling shoes. You'll see two parallel slots designed for the 2-bolt cleat system.
- Apply grease to the cleat bolt threads to insure that the bolts do not corrode, rust or seize in the cleat nut.

Step 2: Position the Cleats
- Foot Positioning Tip: To start, align the cleats so they are centered under the ball of your foot. This is the optimal position for most riders.
- Slide the cleat forward or backward slightly to adjust your stance based on personal preference.
Step 3: Insert Cleat Screws
- Place the cleat over the slots on the shoe sole, aligning the bolt holes with the slots.
- Insert the screws through the cleat holes into the mounting slots.
Step 4: Tighten the Screws
- Use the Allen wrench to tighten the screws snugly. Alternate between screws to apply even pressure. Avoid overtightening, which could strip the threads or damage the sole. Each pedal manufacturer uses different materials and due to variations in cleat and pedal designs. Please make sure you have enough clearance for the cleat to properly engage to the pedal and allow for smooth pressure free pedal engagement and pedaling. Follow the pedal brand instructions manual for the must current and correct Torque spec to avoid stripping the Cleat Bolt and Nut.
- Tighten until the cleats feel secure, but leave room for minor adjustments.
Cleat Adjustment Tips
- Toe-In/Toe-Out Angle: Adjust the angle of the cleat to match your natural foot alignment.
- Most riders start with the cleat pointing straight forward.
- Make small adjustments to reduce knee strain during pedaling.
- Test Ride: After installation, test your cleats in a stationary position or on a short ride. Fine-tune the position if you feel discomfort or strain.
5. Final Tightening
- Once satisfied with the position, tighten the screws fully. Periodically check the screws for tightness after a few rides, as they can loosen over time.
Maintenance & Tips
Cleaning:
- Keep the cleats and shoe soles free from mud or debris to ensure proper function.
Rubber Outsole
The rubber outsole ensures a good grip, if needed. If you notice the rubber sole starting to detach from the hard base, follow these steps:
- Clean both the rubber sole and the composite or carbon sole thoroughly with rubbing alcohol.
- Reattach the sole using a shoe glue or a silicone-based adhesive.
Replacement:
- Replace cleats when they show significant wear, as this can affect engagement with the pedals.
- In certain cases, the rubber sole can be replaced. Please contact info@suplest.com to find out what options are possible.